
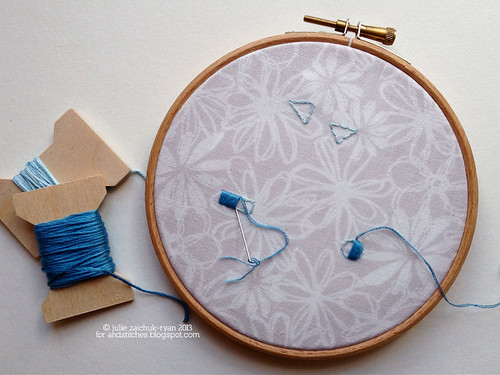
Today I'm going to show you three basic tips for smoother and easier satin stitch. I can't speak for anyone else, but these three simple tips helped me so much when I learned them - I hope they help you as much as they did me!
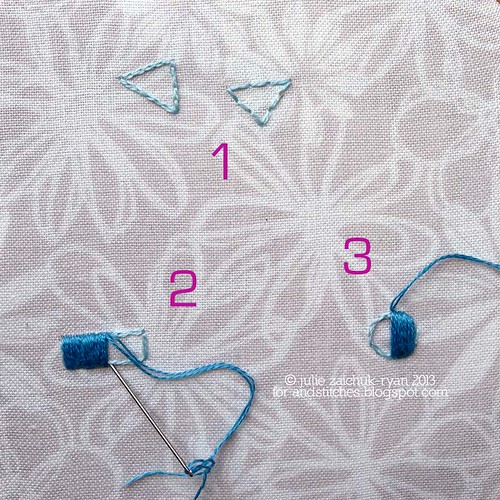
1: Before satin stitching anything, outline your shape in split stitch (the left triangle). Although most of us would prefer to outline in back stitch (the right triangle), split stitch leaves a very sturdy, smooth line for your satin stitch to work around. If you look closely at the spot where two back stitches meet, they leave a little indentation in the line. When you satin stitch there, there will be an indentation in that too, and it will be more difficult to achieve an even edge.
2: As you work, try to come up and down around that outline at a slight angle, almost as if you want to tuck your satin stitches around the shape. Again, this will help keep a nice even edge.
3a: Start in the middle of your shape and then work outwards from there to each side. This helps keep your stitches straight across the shape; many satin stitchers end up frustrated with stitches that gradually start leaning as they work. If you start with a nice straight base to work from in the middle, you will find it much easier to keep your stitches standing up straight around it.
3b: Many stitchers (including myself, for many years!) find themselves annoyed that they've satin stitched a little oval when they wanted a little circle. If you've outlined your circle as described above, you'll find that you don't actually have to satin stitch all the way up to the end of your circle to achieve a circular shape. It's the ever-shortening little stitches right up to the sides that create that oval effect. Instead, try stopping a few stitches short of a true circle, more like a square with a rounded top and bottom. The split stitch outline below will peek out just a tiny touch (can you see it on the right of the circle in the photo above?) and fill out the side curves. Of course, I've outlined my shapes in a lighter thread to make it easier to see, but using the same thread for both outline and satin stitch will make the combination of them seamless.
And, lastly, two unofficial tips: firstly, don't be afraid to draw lines with a wash-out transfer pen below to help you keep your direction as you stitch. It's not cheating to have lines to follow! And secondly, if you notice an area that's not as even as you'd like, don't unpick, just stitch over it! Satin stitch is pretty forgiving that way, it's easy to add a stitch here or there without having any big effect.
These are just basic tips and tricks and I'm sure many of you already use some of them as you work, but I hope there's at least a little something here to help you with that ever-tricky satin stitch!
Thank you!
ReplyDeleteExcellent suggestions! I especially like outlining in split stitch rather than back stitch... great idea.
ReplyDeleteThanks! I like the comments about the circles! I'm certainly going to try it your way!
ReplyDeleteThanks for your tips and the time you devote to your instructions.
ReplyDeleteAha! These tips sound like they will make a huge HUGE difference in the quality of my stitches! Thank you!
ReplyDeleteNow that I am finally working on the "other" end of my Canal house runner, I am stitching an area in satin stitch!!! Up til now i have avoided it whenever possible.
Thank you so much for this - I have an area to satin stitch on my current WIP, and your tips will save my nerves! Chrissie x
ReplyDeleteThank you so much for this - I do a lot of satin stitch eyes on felt applique, and I always have trouble with the oval problem. Going to try this!
ReplyDeleteI'm so glad these tips have been helpful to you guys! I hope you'll do some practicing (see Nicole's satin stitch doodling post on the blog now for practice ideas!) and share with us in the Flickr pool - I'd love to see how you come along and if you bump into any tips of your own along the way!
ReplyDeleteThanks so much for the tips! I've always had the hardest time with satin stitch circles turning into ovals.
ReplyDeleteThank you!
ReplyDelete