

Although it's a proper stitch in its own right, long-and-short stitch is also a great alternative to satin stitch. When your shape is a little too big and you feel that satin stitches would be too long - resulting in puckered stitches or loose stitches that don't stay in place - long-and-short stitch saves the day!
It looks kind of intimidating though, doesn't it? Like it really takes a long time to be good at it? But it really doesn't! The truth of the stitch is that the less you think about it, the better it looks.
1.) First, draw your shape:
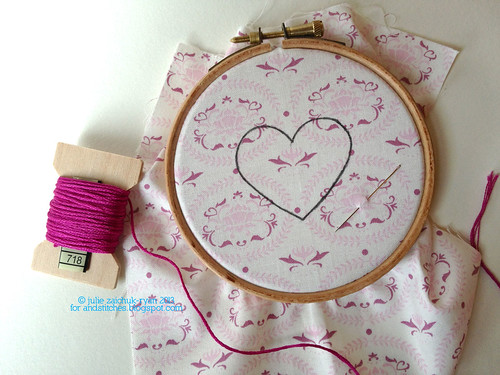
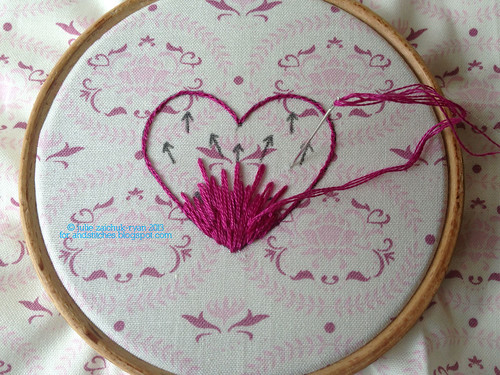
2.) As mentioned in our earlier satin stitch tips post, outline your shape in split stitch for a sturdy, even line to work against. You might also want to draw yourself some arrows (in a removable transfer pen) to help you keep your stitches moving in the direction you want them to:
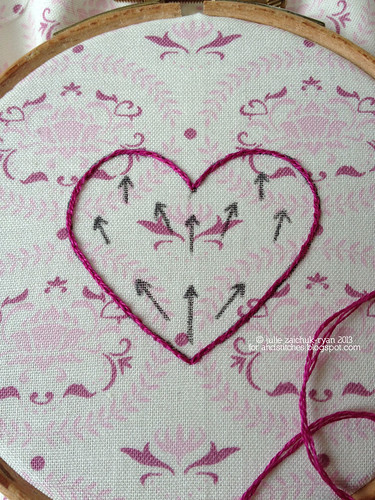
3.) Long-and-short stitch works in rows across your shape, but succeeds by keep those rows very loosely defined. In other words: work your first row of stitches by coming up through the fabric at random places in the shape, then coming back down outside (and tucking around) the lower outline of the shape. Keep the length of your stitches as random as possible - some very long, some very short and some all the lengths in between:
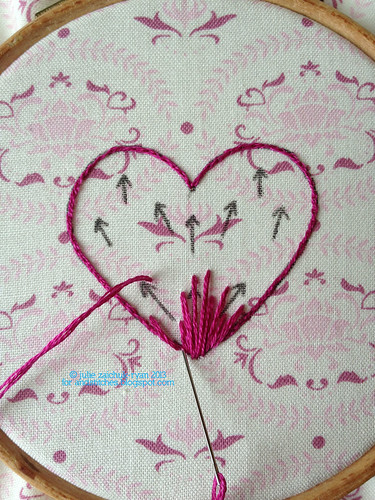
4.) On the next row (and for the rest of piece), you'll work in the opposite direction, your needle coming up through a previous stitch, like split stitch, and the down again somewhere above. Again, keep your lengths random and make sure you come both up and down at varying points. You are trying to avoid a visible line across your shape which would be caused by all your stitches coming up and down at the same level in your shape. Also keep moving in the direction your arrows indicate:
5.) Continue in this way, working in rows (or waves, as I think of it) across your shape, from one side to the other, then back again. Keep your lengths and placement varied. This is a great stitch to work on if you're distracted, because it will be more successful the less you think about it. Don't worry too much about each single stitch, you're going for a larger effect here. Tuck a stitch or two around your outlines as you reach them:

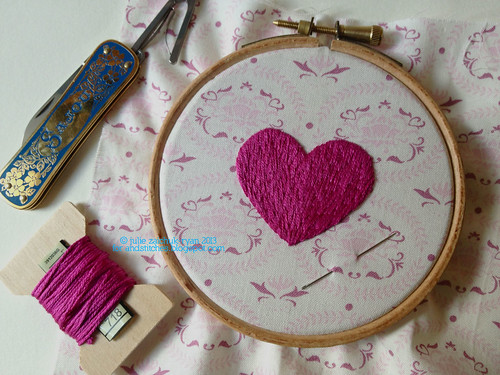
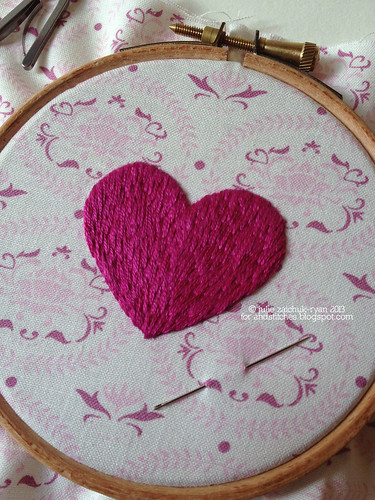
6.) As you get to the top of your shape, tuck your last stitches around the top of the outline, and that's it! Because your stitches came up and down at random places, you should see a smooth, solid fill and no obvious lines where they grouped together. If you notice any bits that could be smoother, don't be afraid to just plop another stitch over it to even it out!
I hope you enjoyed playing with long-and-short stitch today - and if you do any practice, please come show off in the &Stitches Flickr group!
Wonderful tutorial ~ your heart is lovely!
ReplyDelete've had limited success with this stitch and need more practice with it. I like the idea of using the arrows to make sure you're going in the right direction - excellent idea. Thanks! :D
ReplyDeleteabsolutely lovely, great overall effect!
ReplyDeleteDid you read my mind? Just last night I was pondering how to fill a heart with long and short stitches, and here you show me in perfect detail. Thank you!
ReplyDeleteOne of the prettiest little hearts ever! These tutorials you are sharing are wonderful and I thank you for the time and effort. Bookmarked this one along with the satin stitch. The only embroidery i am working on at this time is my Dutch Canal Houses - so it looks like I will be incorporating stitches learned from your tutorials into the houses! Definitely need hearts on one of the houses - right?
ReplyDeleteI've just awarded you with a "Very Inspiring Blogger Award" over at my blog!!
ReplyDeleteYou can view it here: http://sewingfairytales.blogspot.de/2013/05/very-inspiring-blogger-award.html
Well, we thank you very much! How sweet of you!
DeleteI'm *so* glad you all liked this tutorial! I hope you'll give it a go and show us in the Flickr pool! I'd love to see!
ReplyDeleteI'm having trouble with this. It seems like I'm using up way too much thread. I'm curious--how many rows, or waves did it take you to fill your heart? For some reason I'm doing it really inefficiently. lol
ReplyDeleteHi Rachel! I'm SO sorry it took me a few days to see your comment!! It's true that this stitch *really* eats up thread, it's not just you! It should be making a really thick and somewhat padded effect, since there's so much overlapping going on. I used four strands for this example to cover space faster, and I went through thread incredibly fast! I think it took me about 5 waves to cover the shape (which is 1.5" tall). If you'd like to post a photo on Flickr and / or email me for more help ( julie [at] button-button [dot] co [dot] uk ), I'd be happy to help make sure you're on the right track!
DeleteThank you, Julie! That is helpful. I appreciate it. :)
DeleteI think I just need to give it a little more practice. My first attempt was pretty awful and the second was not much better. I think I'm making my long stitches TOO long. I'll keep at it. I love the finished look of your heart. :)
You're very welcome, I'm happy to help where I can! I think the stitch length isn't really a problem as long as they are covered randomly with other long and short stitches - if that makes sense? A really long stitch is fine, but make sure you interrupt a few of them low down on the stitch, a few up high on the stitch, etc. If you are still having trouble, please do feel free to email me a photo and I'll see what I can suggest!
Delete